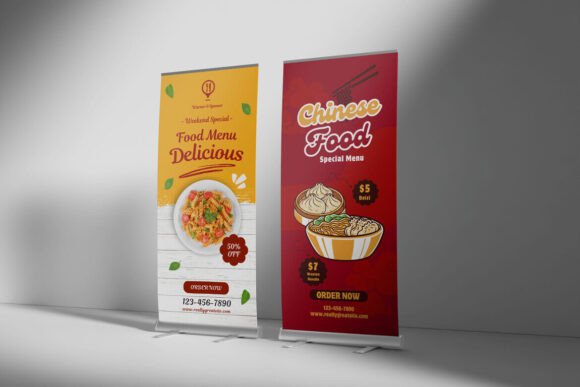
Stand Banner Mockup: Elevating Your Design Presentation with Precision
In the competitive landscape of visual marketing, the gap between a good design and a successful campaign often lies in presentation. A Stand Banner Mockup serves as the critical bridge between your digital creation and its real-world application. Whether you are a freelance graphic designer, a small business owner preparing for a trade show, or a marketing agency pitching to a new client, the ability to visualize your artwork in a realistic setting is invaluable. This tool allows you to showcase your designs professionally in a realistic 3D display, providing stakeholders with a clear understanding of how the final product will look in physical space.
However, many creators overlook the technical nuances that separate a mediocre mockup from a professional-grade asset. Understanding these details can save you hours of revision time and prevent costly printing errors. By leveraging high-quality resources, such as those available in PSD Photoshop format with smart-object features, you can replace current designs with your own within seconds, ensuring efficiency without compromising on quality.
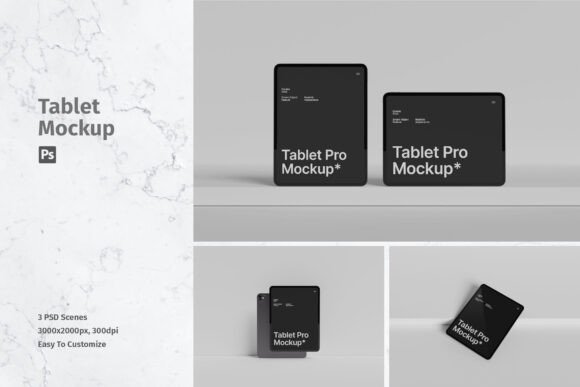
The Trap of Low-Resolution Previews
One of the most common mistakes beginners make is relying on low-resolution images for their final presentations. It is tempting to use a quick screenshot or a web-sized JPEG because it loads faster and takes up less storage space. However, when you present a banner design to a client or print it for a large-format display, pixelation becomes immediately apparent. This lack of clarity can undermine the perceived value of your work, making even the most creative concepts appear amateurish.
To avoid this pitfall, always prioritize high-resolution assets. A premium Stand Banner Mockup should offer a resolution of at least 3000x2000 pixels at 300 dpi. This density ensures that every fold, shadow, and texture is rendered with crisp detail. When you zoom in to check the alignment of your logo or the readability of your text, the image must remain sharp. Using a file with these specifications guarantees that your digital proof looks as professional as the printed result, fostering trust and confidence among your audience.
Misunderstanding Smart Objects
Another frequent oversight involves the misuse or underutilization of smart objects. Many designers new to Photoshop attempt to paste their designs directly onto the banner layer, using transformation tools to warp the image manually. This approach is not only time-consuming but also destructive to the original image quality. Every adjustment degrades the pixels, leading to blurry edges and distorted proportions.
The correct approach is to utilize the smart-object features inherent in professional mockup files. These features allow you to replace the design easily and quickly. By double-clicking the smart object layer, you open a separate document where you can place your artwork. Once saved, the changes automatically update in the main mockup file, maintaining perfect perspective and lighting integration. This workflow not only speeds up the process but also preserves the integrity of your original design, allowing for non-destructive editing and easy revisions.
Ignoring Lighting and Environmental Context
A design does not exist in a vacuum. One subtle yet significant error is choosing a mockup environment that clashes with the brand’s identity or the intended use case. For instance, placing a corporate financial banner in a gritty, urban street setting might send mixed messages to potential clients. Conversely, a vibrant festival poster might look out of place in a sterile, white studio background.
When selecting a Stand Banner Mockup, consider the context. Look for files that offer realistic lighting conditions that complement your color palette. If your design features bright, neon colors, ensure the mockup has adequate ambient light to reflect those tones accurately. Pay attention to shadows and highlights; they provide depth and realism, making the banner appear as a tangible object rather than a flat digital insertion. A well-chosen environment enhances the narrative of your design, helping viewers imagine the banner in their own spaces.
Overlooking File Organization and Help Resources
Efficiency is key in professional design workflows, yet many users ignore the organizational structure of their mockup files. Downloading a complex PSD file without reviewing its layers can lead to confusion and frustration. You might spend valuable minutes searching for the correct layer to edit, only to accidentally modify a background element or a shadow mask.
High-quality mockups typically come with a help file or well-labeled layers. Before starting your project, take a moment to review these resources. A good help file will guide you through the specific steps required to replace the design, adjust colors, or modify the background. Familiarizing yourself with the file structure ensures a smoother experience and reduces the likelihood of errors. Additionally, keeping your workspace organized by grouping related layers can further streamline your workflow, especially when working on multiple variations of the same design.
Clarifying Image Rights and Usage
A critical legal and ethical consideration often missed by creators is the distinction between the mockup template and the preview images. It is essential to note that photos used in the preview are not included; they are just for illustration purposes only. Attempting to use the model’s face, the background scenery, or any other proprietary elements from the preview in your final commercial project can lead to copyright infringement issues.
Always verify the license terms of the mockup file. Most reputable sources provide templates where you have the right to use the structure and lighting effects but require you to supply your own content. This means you should replace the placeholder graphics with your original artwork or licensed stock images. By respecting these boundaries, you protect your business from legal complications and maintain professional integrity. Focus on the utility of the mockup as a vessel for your unique creations, rather than trying to repurpose the illustrative elements provided by the creator.
Making the Right Choice for Your Project
Selecting the right Stand Banner Mockup involves more than just picking the most visually appealing thumbnail. Consider the specific needs of your project. Do you need a front-facing view for a website header, or an angled perspective for a social media post? Check the file format to ensure compatibility with your software version. While PSD is the industry standard, verify that your version of Photoshop supports the smart object features used in the file.
Furthermore, evaluate the ease of use. A user-friendly mockup should allow you to swap designs within seconds, enabling rapid iteration. This agility is crucial when working with tight deadlines or demanding clients who request frequent changes. By investing in a high-quality, well-structured mockup, you equip yourself with a tool that enhances productivity and elevates the perceived value of your work. Remember, the goal is not just to display a design, but to communicate its potential impact in the real world effectively.
In conclusion, mastering the use of a Stand Banner Mockup requires attention to detail, technical proficiency, and strategic thinking. By avoiding common pitfalls such as low-resolution usage, improper layer management, and contextual mismatches, you can create presentations that truly resonate with your audience. Embrace the power of smart objects, respect intellectual property rights, and choose environments that amplify your message. With these practices in place, your design portfolio will not only look professional but also demonstrate a deep understanding of visual communication principles.